
A critical step to sending emails on Go-Mailer is the audience creation. Before sending campaigns, you are required to create your group of audiences for proper segmentation.
Go-Mailer provides you with unlimited audience segmentation for free, so you can create as many segmentations for personalized targeting. In this article, you will learn how to create an audience on Go-Mailer, as well as how to add your contacts to the audience.
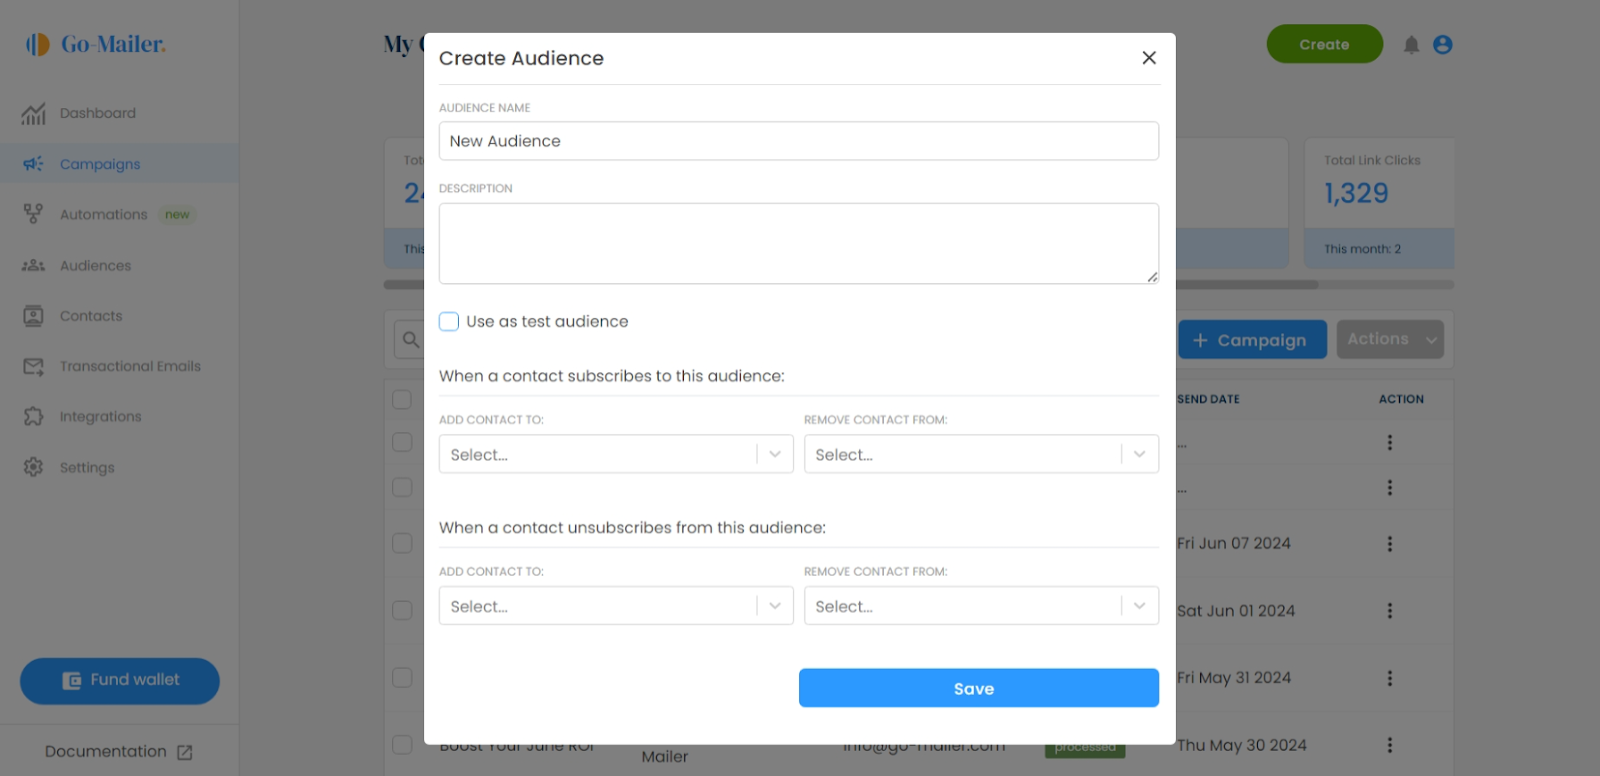
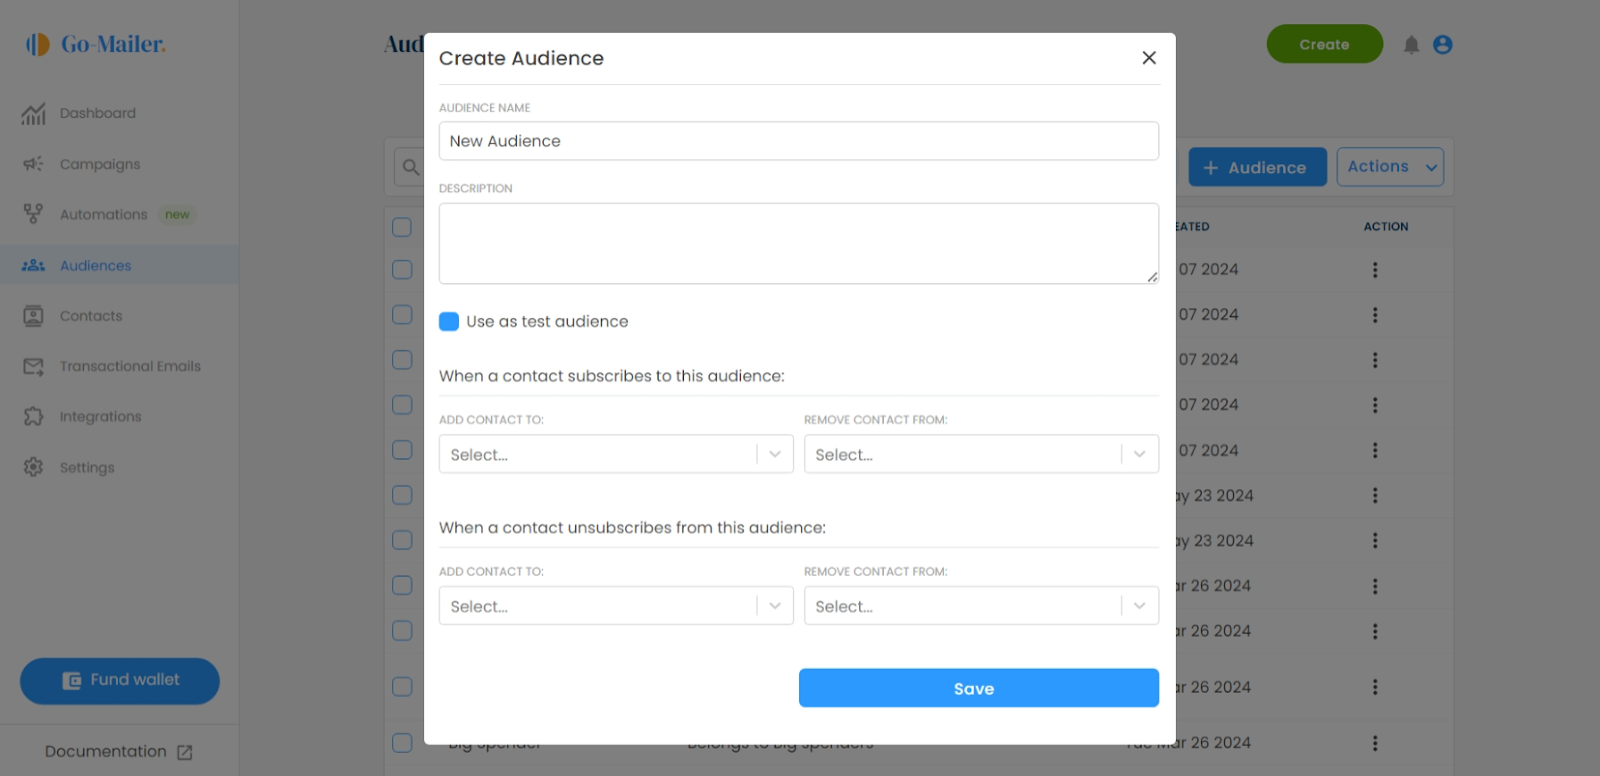
Create Your Audience
To create an audience,
1. Log in to your Go-Mailer account
2. Select ‘create’ and click on ‘create audience’

3. Input your audience name. Your audience name is the most important and only required field for creating a new audience
4. On the description tab, put a brief description of your audience
5. If you want your contacts to be automatically added to another audience or removed from an audience when added to the audience you are creating, you can state it.
6. After filling all your desired fields, hit the save button!
Adding Contacts to Your Audience
You can create a contact to multiple audiences without worrying about duplicates. This is to ensure that you can adequately segment your audience and maximize our tools for advanced targeting and personalization.
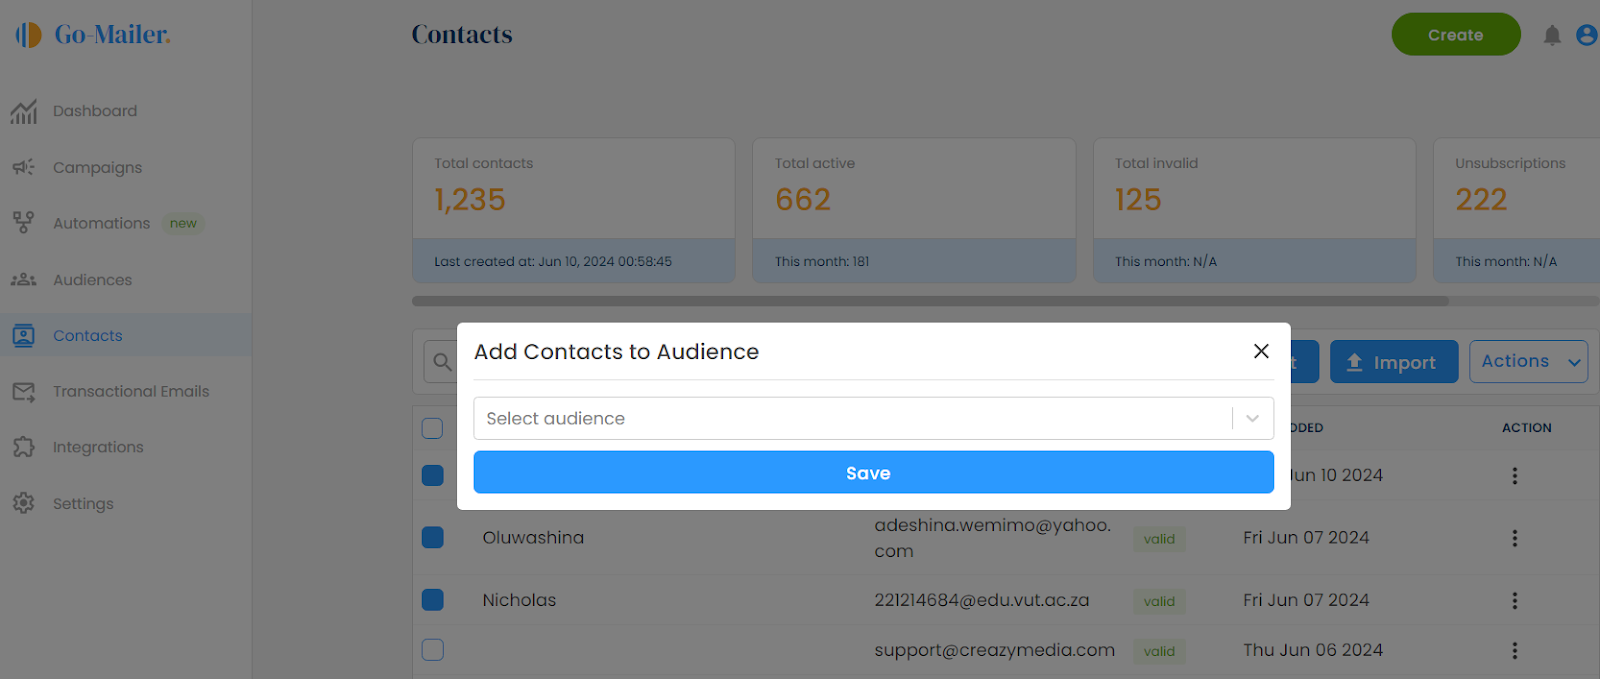
Add Contacts Manually
You can manually add your contacts to an audience using the steps below:
1. On your contacts page, select the contacts you want to add to an audience
2. Click on actions
3. Select ‘add to an audience’
4. Choose the audience you want to add the selected contacts to
5. Hit Save
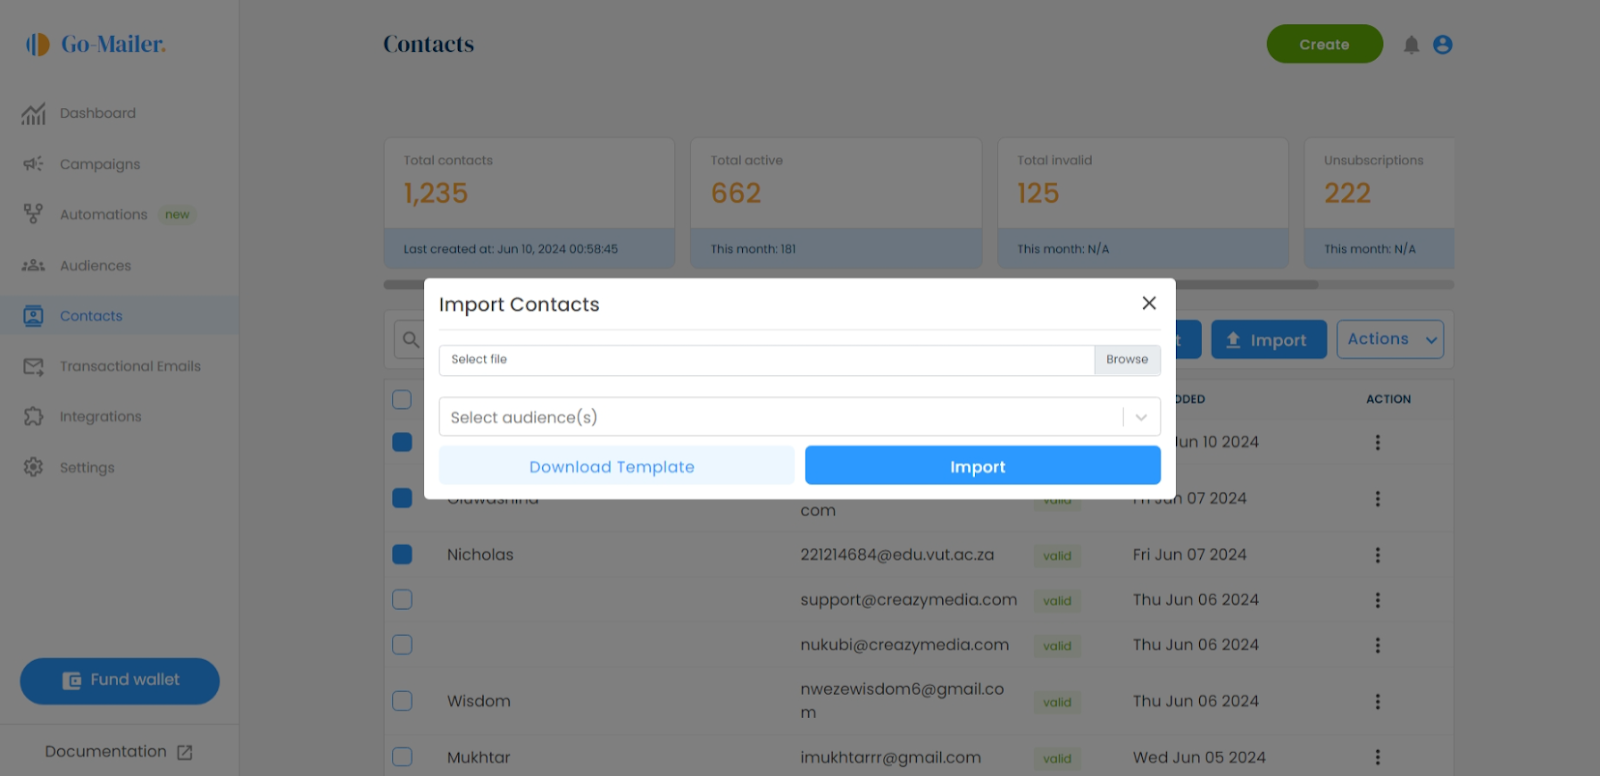
Import Contacts to an Audience
This option is suitable for adding multiple contacts to an audience. You can also use the importation option to add your contacts to multiple audiences at once.
1. On your contacts page, select the import contacts option
2. Download your CSV file and select the audiences you want to import the contacts to
3. Hit save
What if my contact already exists?
This is the best part! You can always import existing contacts to new audiences without worrying about duplicate contact creation.
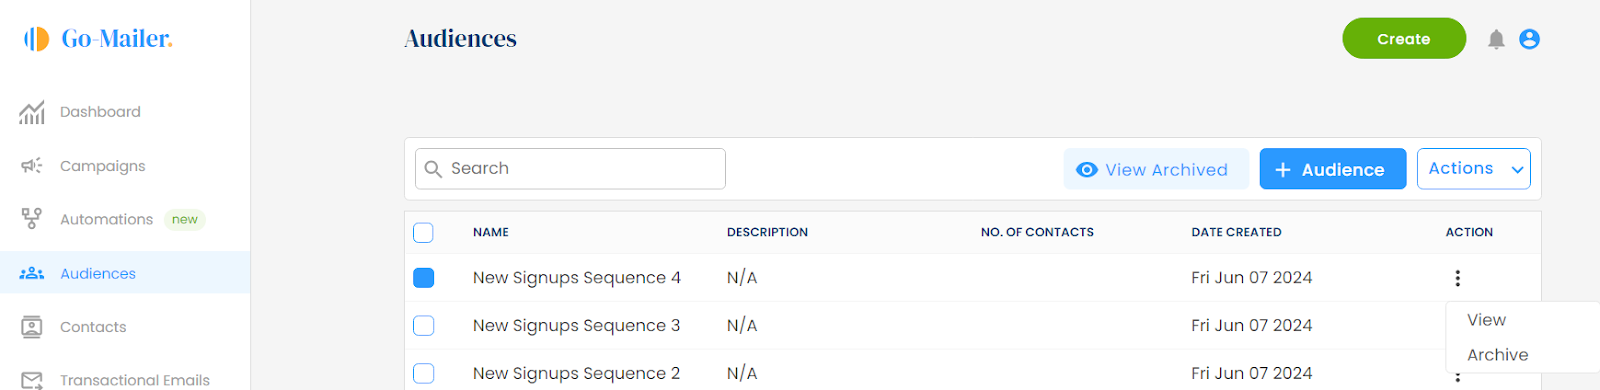
Deleting an Audience
On Go-Mailer, you can only edit and archive an existing audience. If you want to disable an audience, you can use the archive button instead. This deactivates the audience and hides it.
To archive an audience,
1. Go to the audience page on your Go-Mailer account
2. Select the audience you want to archive
3. Click on the Actions button and select archive
Creating a Test Audience
Go-Mailer’s test audience feature allows you to send out free live emails to your team for free. You can add up to 5 team members to your test audience and send unlimited test campaigns.
To create a test audience,
1. Go to ‘Create Audience’ on your account
2. Put in your test audience name
3. Select ‘use as test audience
4. Hit save


Be the first to comment