
Email automation is a powerful tool for enhancing your marketing efforts, saving time, and increasing engagement with your audience. With Go-Mailer, setting up email automation is a seamless and intuitive process. This guide will walk you through each step on how to set up email automation on Go-Mailer, ensuring you can leverage Go-Mailer’s automation tools to increase your conversions.
Understanding Triggers
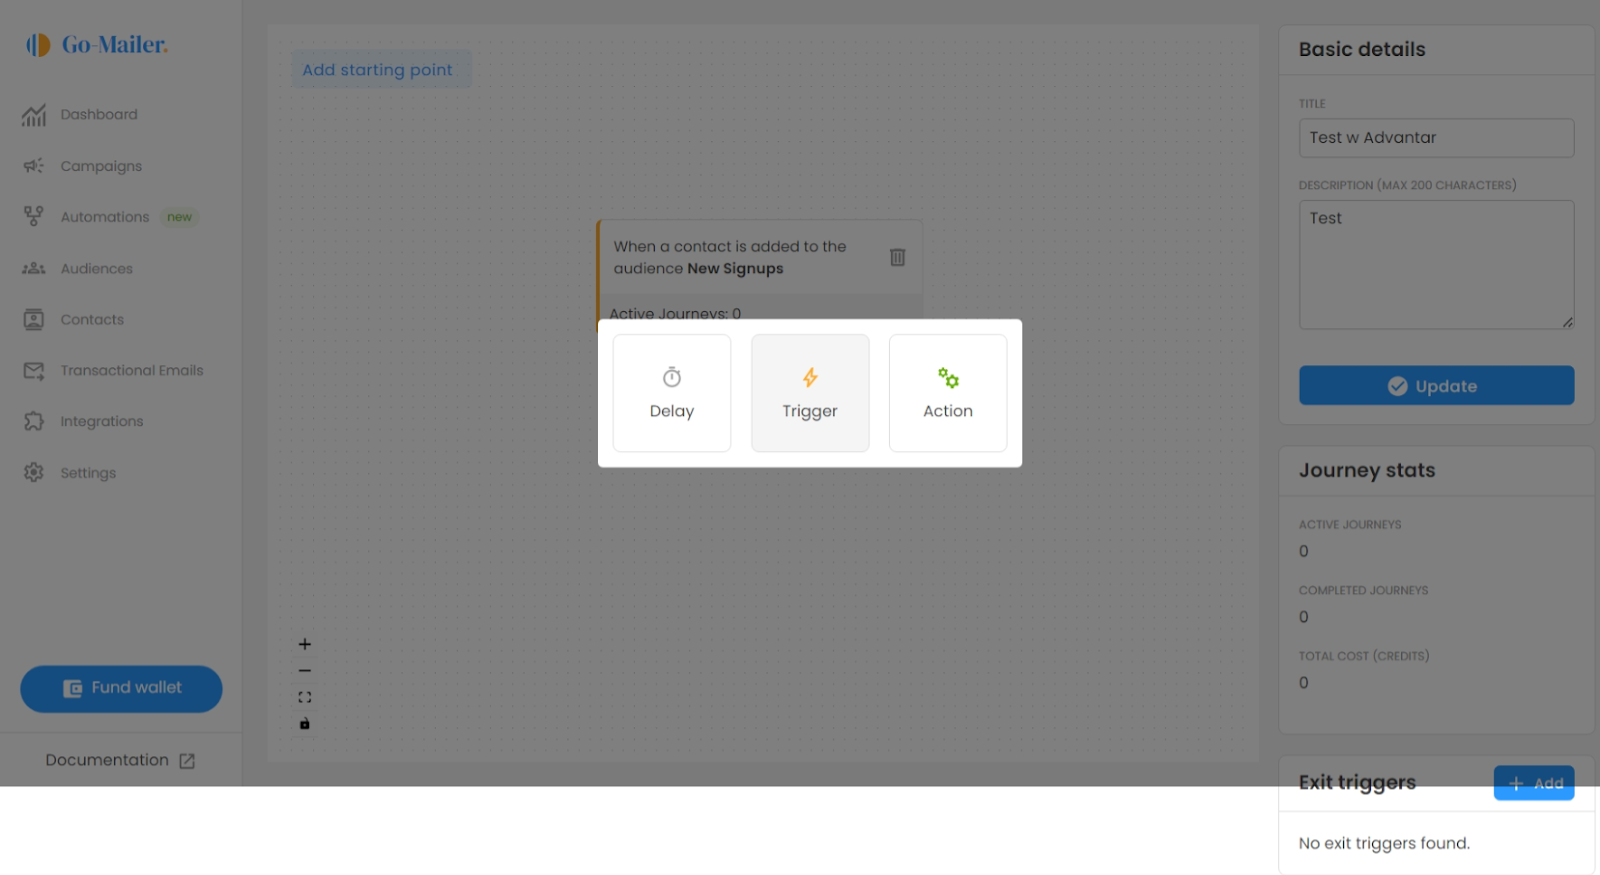
The first step in setting up email automation is understanding triggers. A trigger is an action that activates your automation sequence. On Go-Mailer, a trigger could be a customer subscribing to your newsletter, abandoning a cart, or clicking a link in one of your emails. Go-Mailer has system triggers already set up, but you can also create custom triggers based on your marketing strategies and integrations.
Here’s how you set up a trigger on Go-Mailer:
- On your account, go to your automation, and click on ‘New Automation.’
- Input a title for your automation and save.
- The next step is to choose a starting point, which is the trigger,then select a trigger from the list or create your own custom trigger.
- Hit the ‘save’ button
Setting up Actions
Next, we have actions. An action is what happens once a trigger is activated. For example, you might want to send a welcome email to new subscribers, add them to a specific audience, or even remove them from a different list. Think of an action as a direct response to your customers’ triggers.
To set up an action,
- Click on the + button below the trigger
- Click on ‘action’ and choose your desired action.
- Hit save
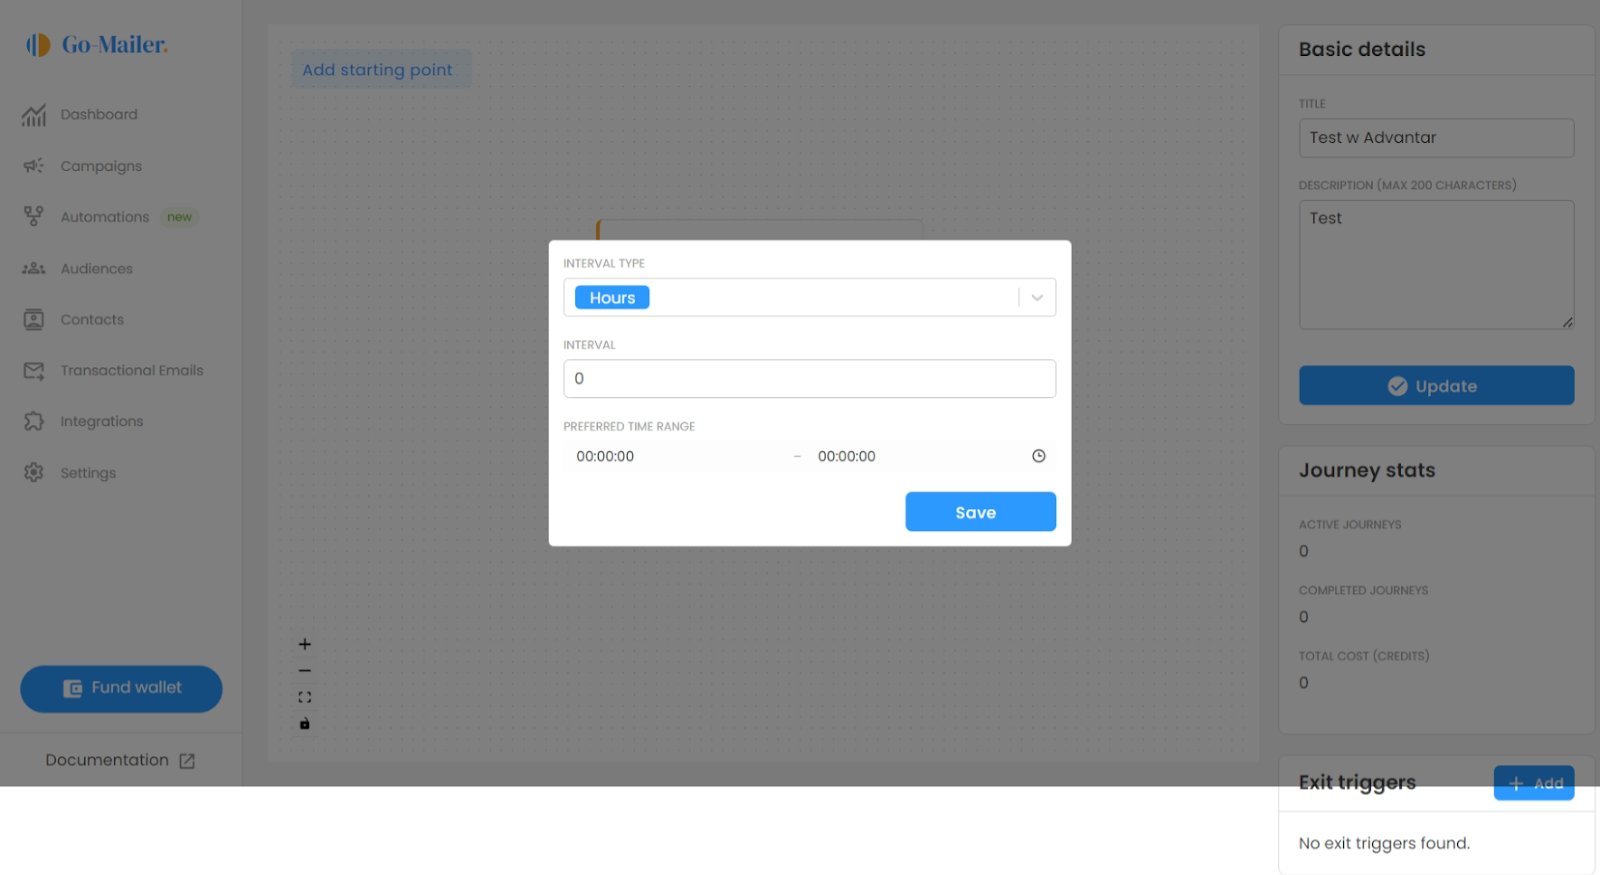
Adding Delays
A delay is the time gap you set between your trigger and the action. For instance, you might want to wait three days after someone subscribes to send them a follow-up email.
On Go-Mailer, you can easily add a delay by selecting ‘Add Delay’ in your automation sequence. Choose the number of days and time you want to wait, and you’re all set!
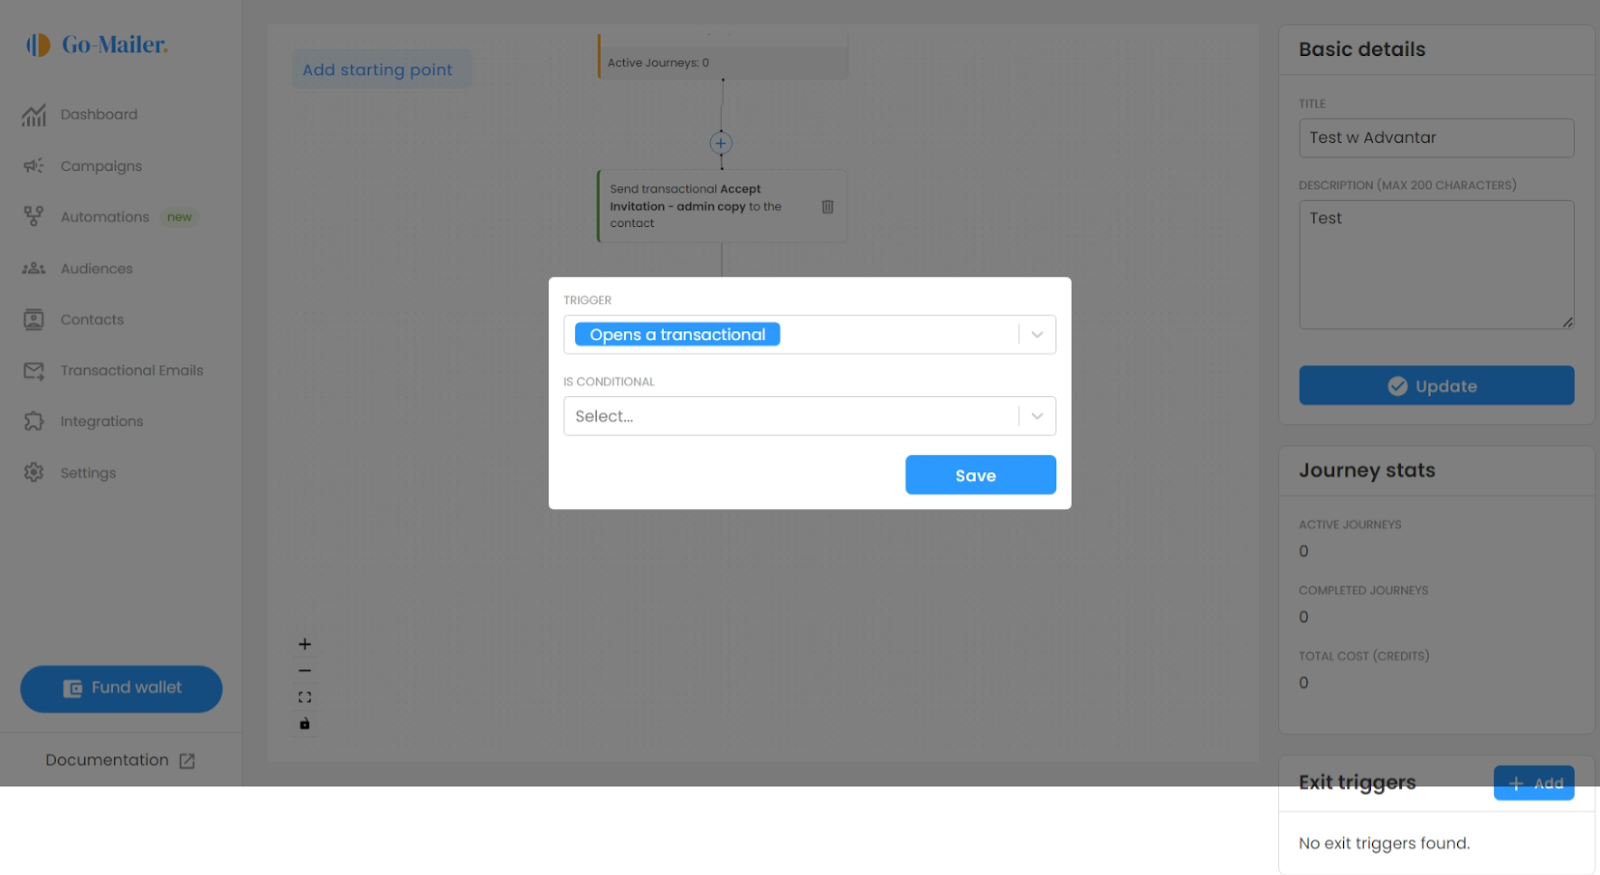
Using Conditionals
A conditional provides an alternative that enables you to handle your customers inaction. This allows for advanced targeting and retargeting for maximum conversions. You can activate conditionals on your automation to trigger actions based on transactional email opens, allowing for more targeted and personalized communication with your audience.
To add a conditional in your automation workflow,
- select your trigger.
- Under ‘is conditional ‘, select yes and click save.
- Next, set your criteria and save. This helps you tailor your emails based on your customers’ actions, ensuring they receive the most relevant content
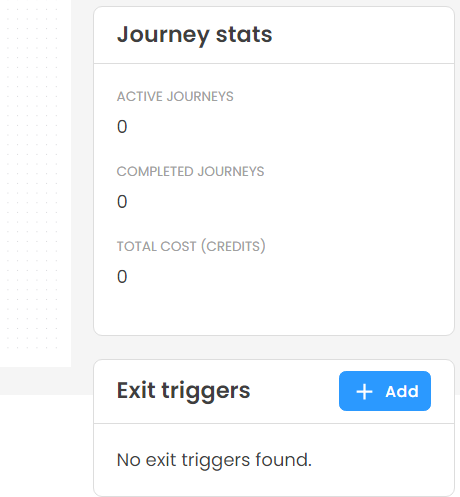
Using Exit Triggers
Finally, we have exit triggers. An exit trigger is the final step in your automation, indicating that a customer has completed their journey. It’s essential to set this up to track your success and make informed decisions.
To configure an exit trigger, select ‘Add Exit Trigger’ in your automation sequence. Define the conditions under which the automation should end, and you’re good to go!


Be the first to comment