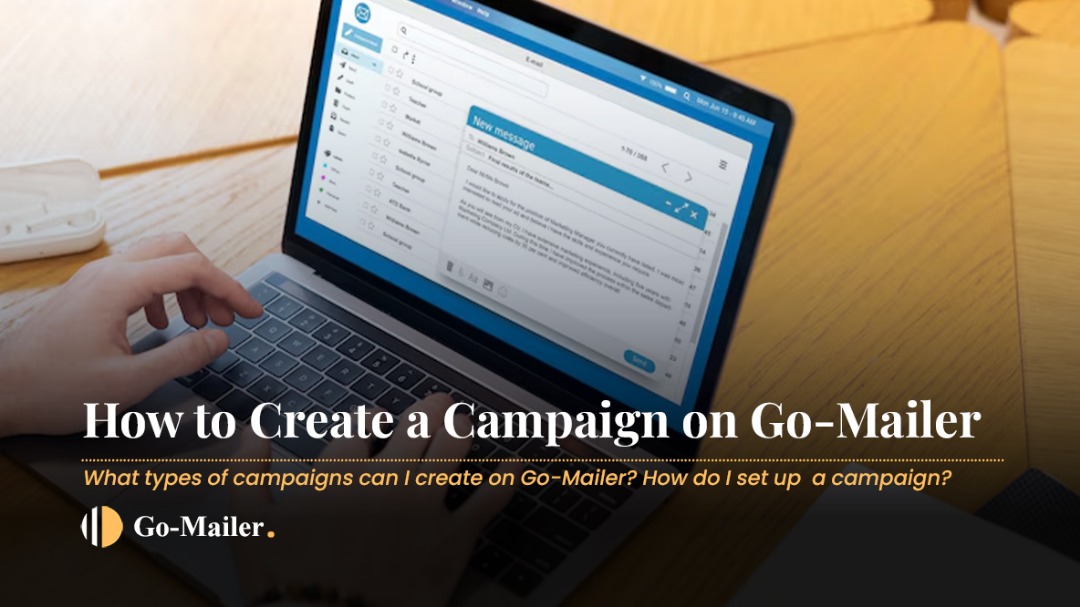
Are you new to Go-Mailer, or do you want to learn the core principles behind creating an effective email campaign? This guide will walk you through how to create an email campaign on Go-Mailer. Whether you’re announcing a product update, onboarding new users, or re-engaging your audience, Go-Mailer makes it easy to create and launch email campaigns. Here’s your up-to-date guide to getting started.
What is an Email Campaign?
An email campaign is a targeted email sent to your subscribers at a specific time to achieve goals like promoting a product, sharing updates, or driving engagement. With Go-Mailer, you can create, send, and monitor campaign performance and conversions seamlessly.
Creating a Campaign
To create a campaign on Go-Mailer:
- On your Go-Mailer account, navigate to “Create” > “Create Campaign”.
- Choose your editor: You will be presented with two options:
- Plain Text Editor: Ideal for inserting pre-designed HTML templates and working with simple text and link-based content.
- Template Builder: A drag-and-drop editor to design visually appealing emails without coding; perfect for professional, engaging newsletters.
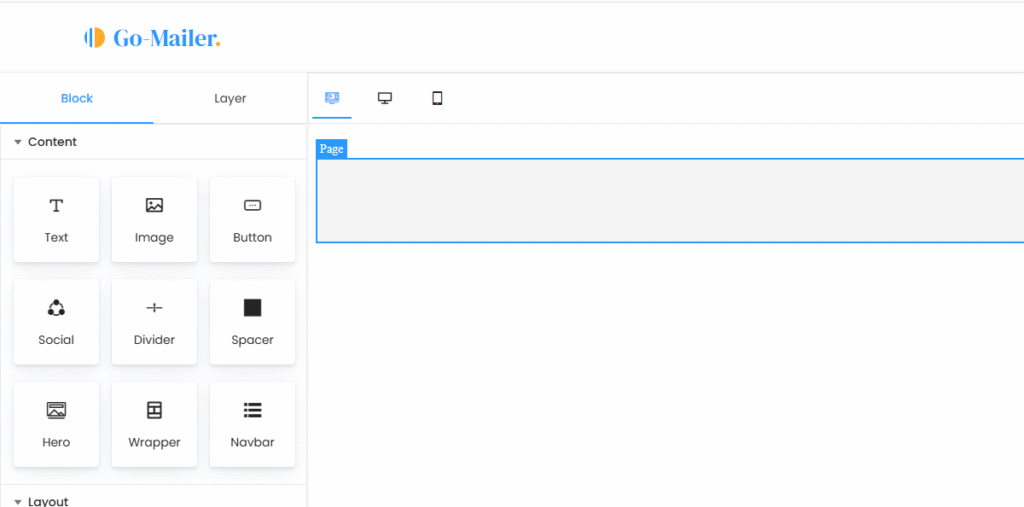
- Design Your Email: In the template builder, drag elements like text, images, dividers, buttons, and social icons to build your email. You can also add personalization options like @firstname, to make emails feel tailored and personalized to your recipients.
- Design Your Email: In the template builder, drag elements like text, images, dividers, buttons, and social icons to build your email. You can also add personalization options like @firstname, to make emails feel tailored and personalized to your recipients. Here are the different blocks on the Go-Mailer editor, and how you can effectively use them to create visually appealing campaigns for your customers:
- Text block:

This is a foundational element for your email content. Use this to add and format written content like paragraphs, headlines, and links. It’s perfect for your main message, introductions, and closing.
- Image block:

The Image Block on the Go-Mailer editor lets you upload and insert visuals like product images, banners, or logos. It’s great for grabbing attention and visually enhancing your message.
- Button:

This allows you to add clickable buttons that link to your website, landing page, or special offer. You can customize the color, text, border, and alignment to match your brand and drive clear calls to action, like “Shop Now,” “Read More,” or “Log In.”
- Social:

Adding social links helps you stay connected with your audience beyond the inbox. The Social Block on the Go-Mailer editor lets you add your preferred social media icons. You can also adjust the layout, icon style, size, and even add custom text to match your email’s look and feel.
- Divider:

Adding a divider helps you break up sections of your email for better flow and readability. With the divider, you can insert horizontal lines and customize their thickness, style, width, and color to create clean visual separation between content blocks.
- Spacer:

Spacers lets you add blank spaces between sections of your email. Adjust the height to control spacing and create a clean, well-structured layout that improves readability and visual flow.
- Social:

Adding social links helps you stay connected with your audience beyond the inbox. The Social Block on the Go-Mailer editor lets you add your preferred social media icons – like Instagram, Facebook, X, LinkedIn, and more. You can adjust the layout, icon style, size, and even add custom text to match your email’s look and feel.
- Hero:

Need to make a bold first impression? The Hero Block on the Go-Mailer editor helps you do just that. It combines a striking image, headline, and button in one clean section; perfect for spotlighting a product, promo, or big announcement. You can tweak the layout, background, text, and button to make it pop and match your brand vibe.
- Wrapper:

The Wrapper works like a flexible container for organizing your email layout. You can insert and group other blocks- like text, images, buttons, and more – into a wrapper to build structured sections. Customize the background color, padding, alignment, and width to suit your design. You can also use multiple wrappers in one email to clearly differentiate content sections, and pair them with Spacer Blocks for clean, breathable layouts.
- Navbar:

Go-Mailer navbar enables you to insert clickable menu anywhere in your email campaign. You can add multiple navigation links like “Getting Started,” “Try It Live,” or “Components,” and customize the layout, spacing, font, and alignment to match your design. It’s a simple way to guide your readers to important pages while keeping your email layout organized and easy to navigate.
- layout:

The Layout Block on the Go-Mailer editor helps you structure your email using columns. Choose from 2, 3, 4, or 5-column layouts to organize your content just the way you want it. You can insert other blocks, like images, text, or buttons, into each column and adjust their spacing and alignment for a clean, responsive design that looks great on all devices.
Sending a Campaign
After you have created your campaign, it is time to send it.
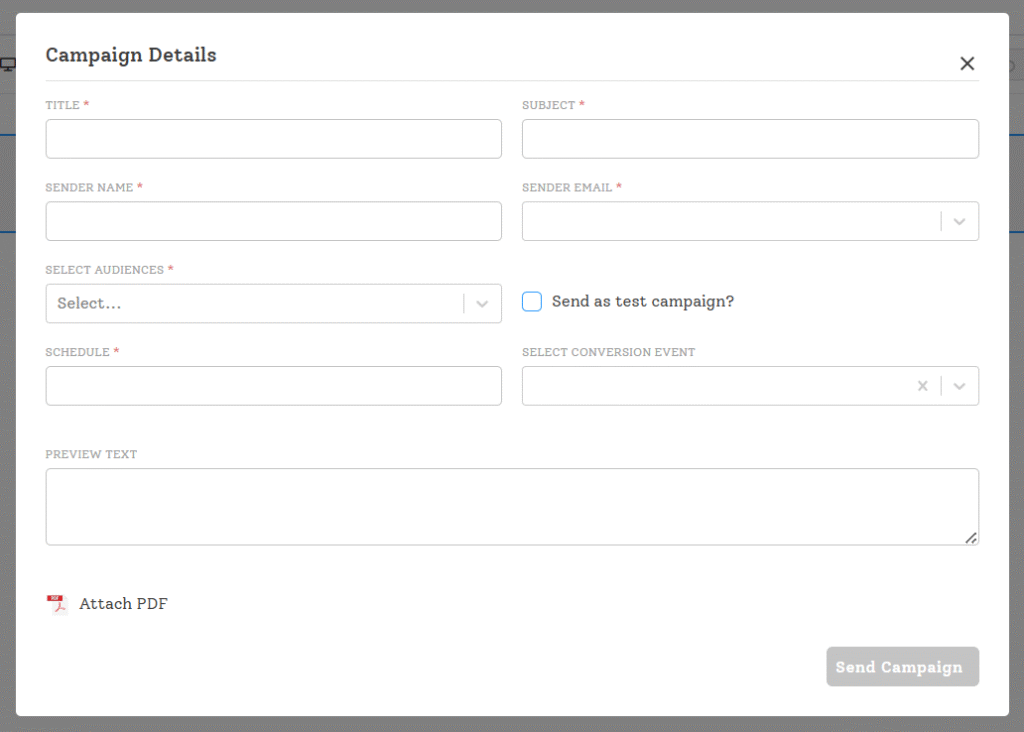
- Add Campaign Details:
- Title: Name your campaign for easy organization, and for internal usage (e.g., “Product Launch April 2025”).
- Subject Line: Write a compelling and personalized subject line (e.g., “Hey @firstname, Check Out Our New Feature!”).
- Sender’s Name & Email: Use a recognizable name (e.g., “Deborah from Go-Mailer”) and ensure the email address is verified to avoid deliverability issues.
- Preview Text: Add a brief summary (60-80 characters) to entice opens (e.g., “Discover what’s new for you!”).
- Audience: Select one or multiple segments from your audience list based on your goals.
- Conversion Event: Assign a conversion event (e.g., “Sign-up,” “Purchase”) to track specific actions tied to your campaign’s objective. This is an optional feature but is highly recommended to help you track specific performance from your campaign.
- Schedule: Use “Schedule Send” to pick a date and time, or send immediately.
- Unsubscription Link: Include it for compliance (optional to hide, but recommended).
2. Test Your Campaign:
- Use the “Send to Test Audience” option to preview your email.
- Check rendering on desktop and mobile to ensure it looks great everywhere.
3. Send or Save:
- In the Template Builder, click “Save Campaign” before sending.
- In the Plain Text Editor, finalize details in the right panel and hit “Send” or schedule.
Pro Tips for Sending:
- Test on multiple email clients (e.g., Gmail, Outlook) to catch formatting issues.
- Schedule sends for optimal times (e.g., mid-morning weekdays) to boost open rates.
- Resend to non-openers after 48 hours for higher engagement.


Be the first to comment